How to model with families from point clouds in Revit
- Import the point cloud in Revit.
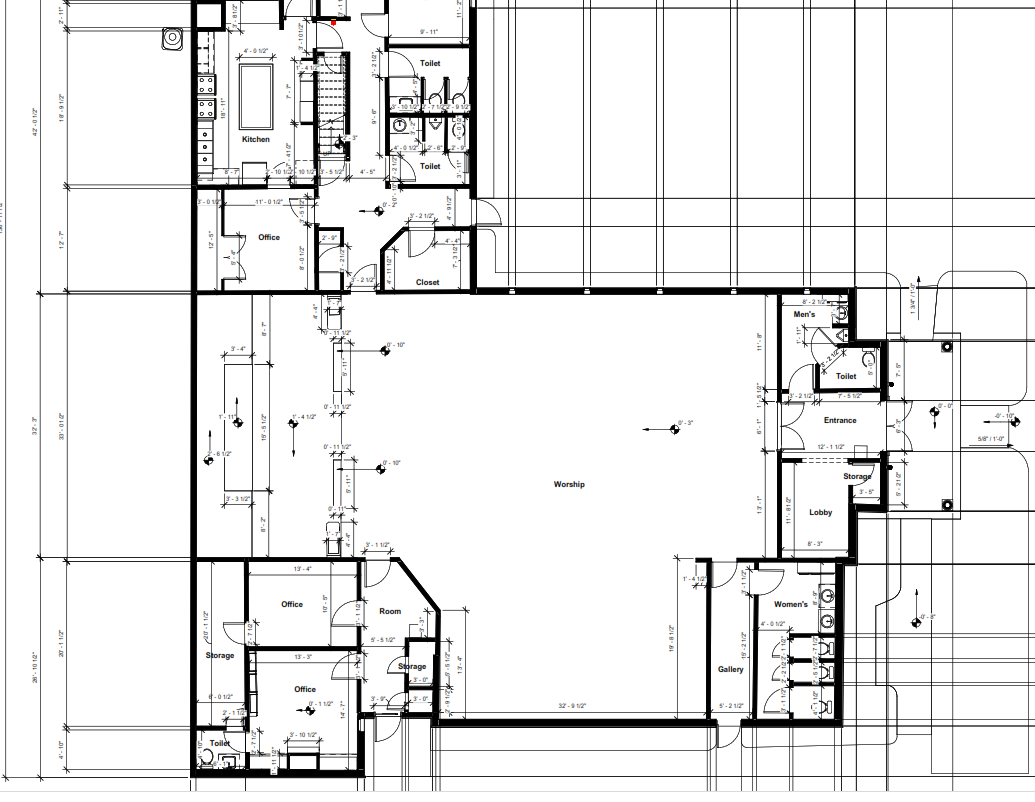
- Create plan views, elevations, sections and sectioned 3d views.
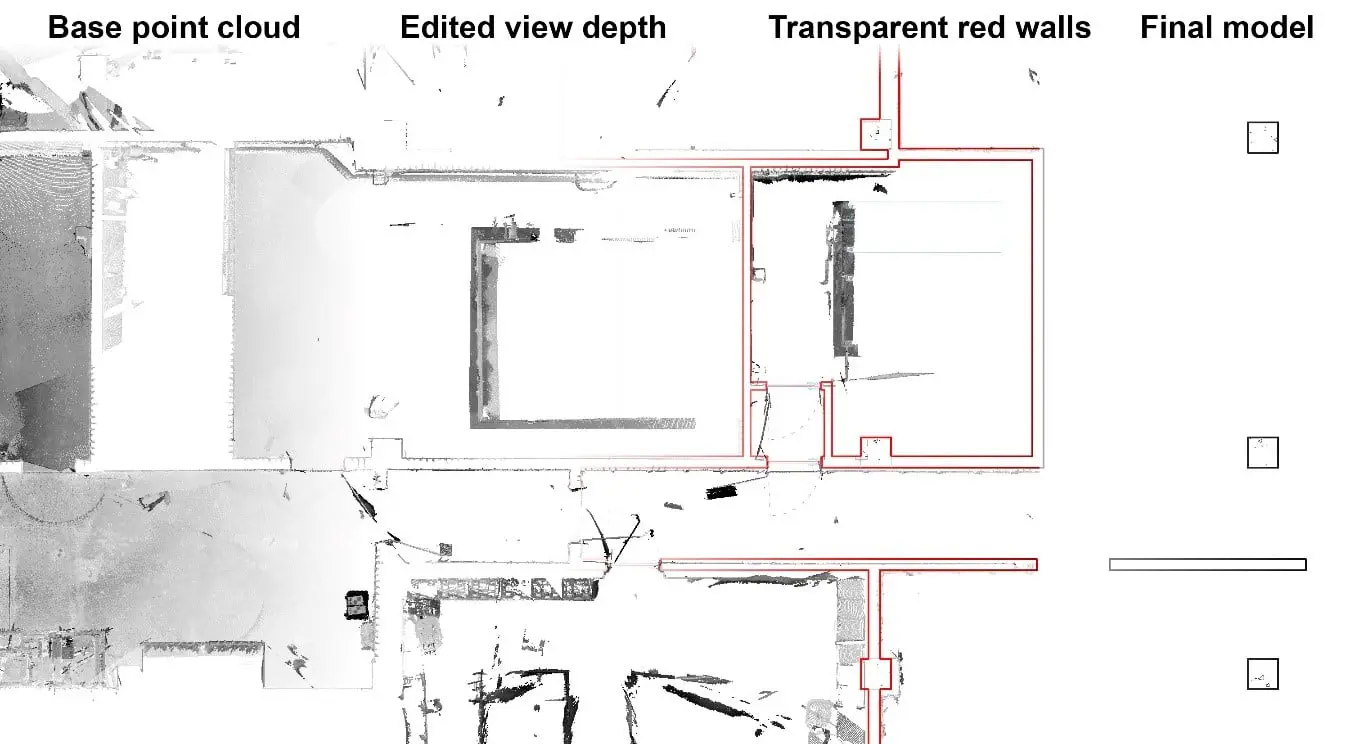
- Duplicate the views with new setting in your display using transparencies and colors.
- Adjust the depth of each view to help you see what needs to be modeled.
- If the family is created in Revit.
To model projects in Revit from imported point clouds, there are good practices that make it easier to work and take advantage of the characteristics of the BIM (building information modeling) environment, such as proper configuration of views and good use of the categories that Revit offers.
Once the point cloud is imported into Revit, the origin of the located project and the coordinated levels it is time to start modeling. It is very useful to start with the creation of plan views, elevations, sections and a sectioned 3D view that allow the project to be viewed from different points of view, but sometimes it is not enough since it can be found that things are not very clear due to the large number of points.
One way to make your job easier is by duplicating the views created with a new setting in your display using transparencies and colors. The transparency option allows to simultaneously see the elements that are being modeled without hiding the point cloud that has reference and by adjusting colors and line thicknesses of the elements that are being modeled (walls, floors, ceilings) allow to clearly differentiate them.
Additionally, there is the depth option for each view that allows us to adjust the range of what we need according to the need. In this way, the contour of the elements cut in the point cloud can be clearly differentiated from those in more distant planes.
The process described above is useful when working with basic families such as floors, ceilings or walls, however for families imported or created directly in Revit it is also important to consider the category of the family so that it is correctly coordinated on the basis of BIM data.
If it is a family created in Revit, just choose the correct category and create or choose the best possible view for its creation. When families are imported, they can come from the library included in the installation of Revit or from external sources (NBS, Revitcity or bim object to name a few) that sometimes are included in a different category than the one required. For this, simply edit the family by changing its category and reloading it into the project. With these procedures when handling information or creating planning tables, families will be where they should be found.